Import your first supplier file into Shopify
Csvio imports a supplier's CSV, Excel, or PDF file into Shopify without any reformatting. This guide covers installing the app and importing your first file.
How do I install Csvio?
Open the Csvio listing on the Shopify App Store and click Add app. Approve the requested permissions and you'll land on the import screen inside your Shopify admin.
How do I import my first supplier file?
Csvio turns any supplier spreadsheet into Shopify products in five steps:
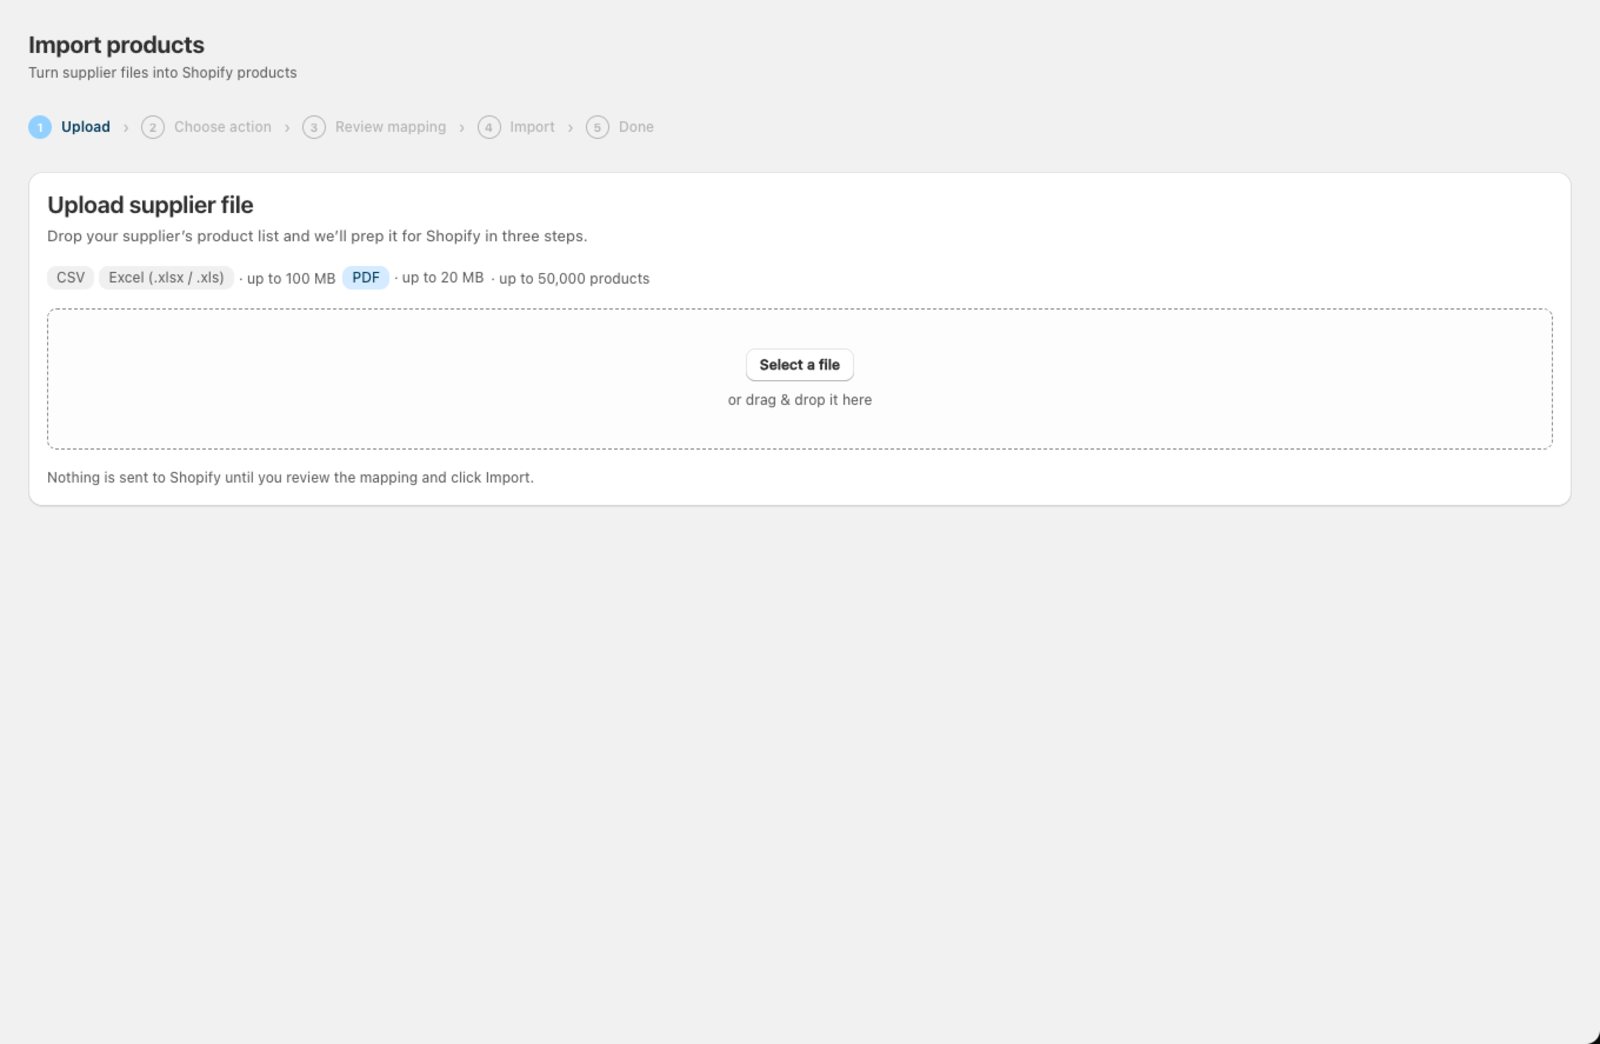
- Upload your file — drag a CSV, Excel, or PDF file onto the upload area, or click Select a file to browse. Csvio reads it as-is; you do not need to rename columns or reformat anything. Nothing reaches your store until you review the mapping and click Import.
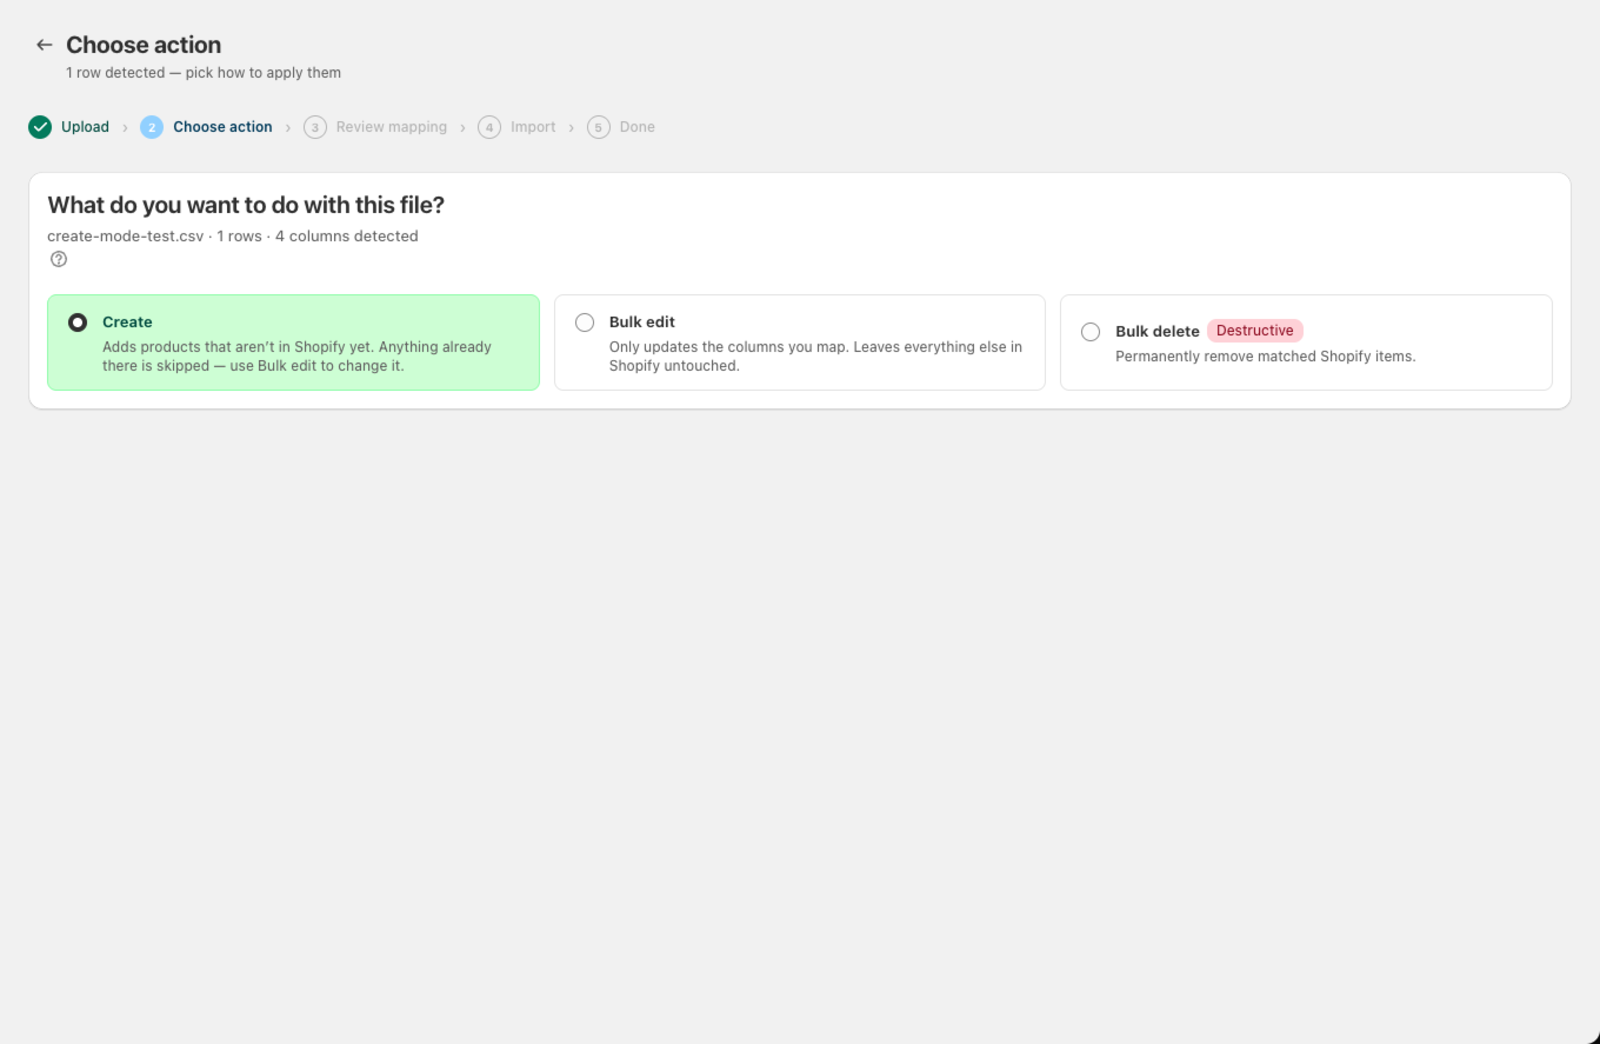
- Choose an action — pick Create to add the products in this file. Other modes (Bulk edit, Bulk delete) are available on the Pro plan for updating or removing products you already have.
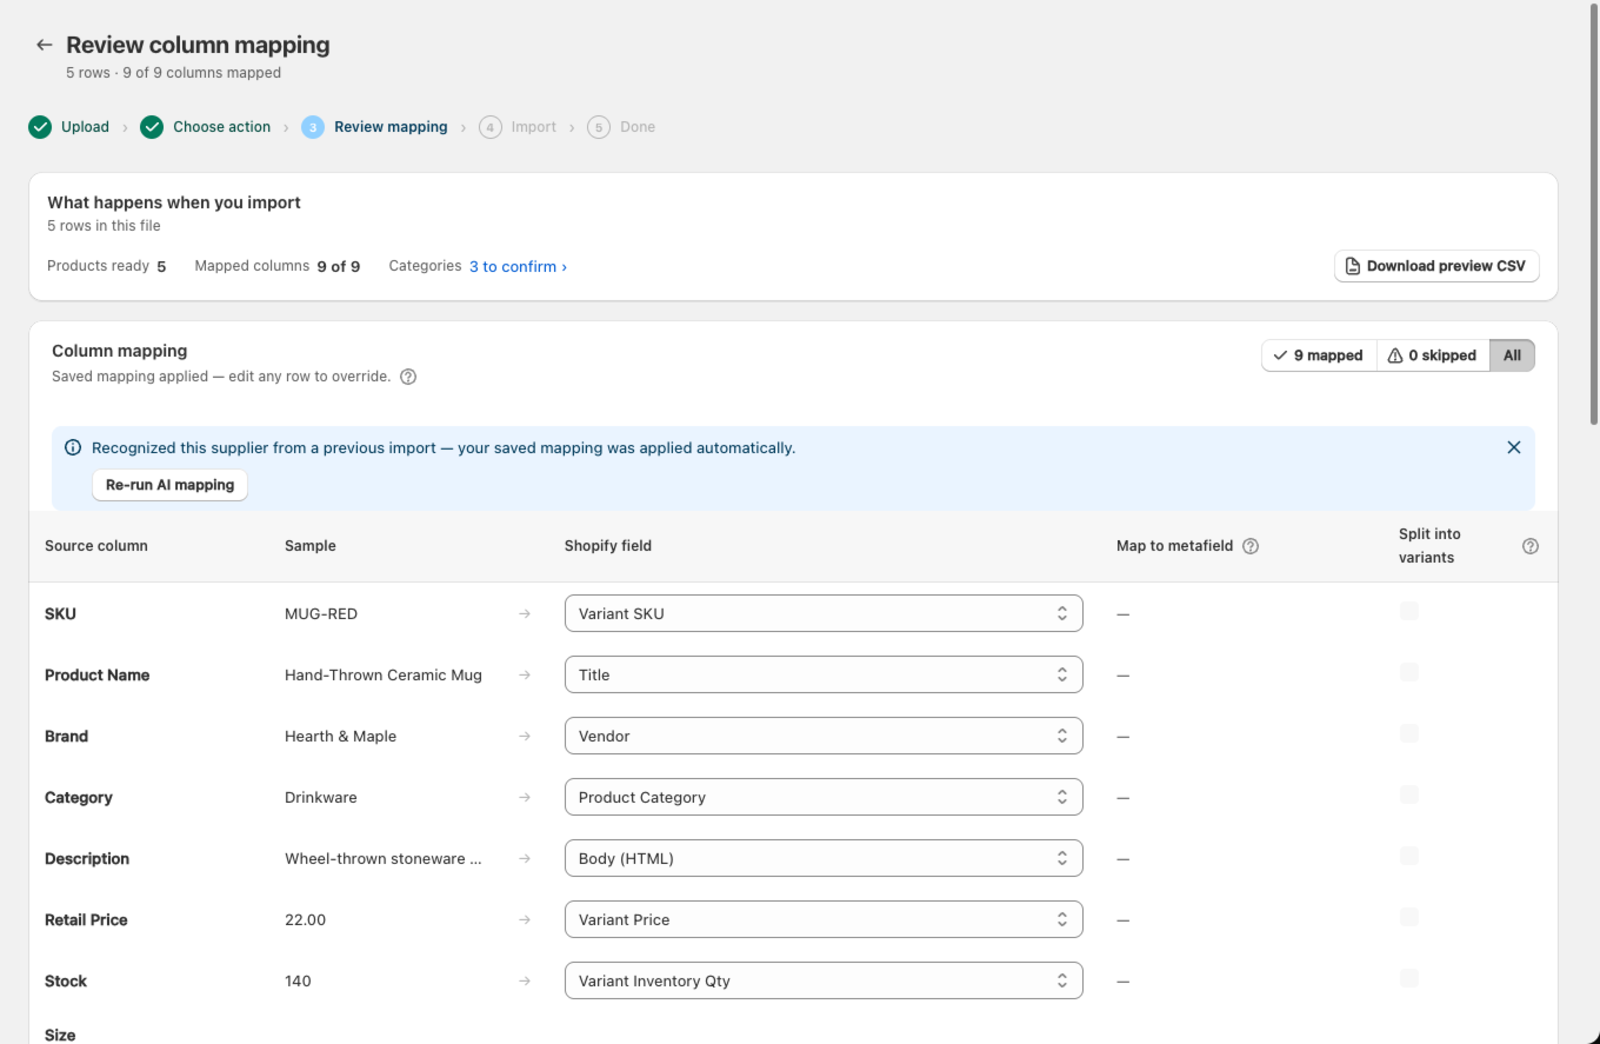
- Review the column mapping — Csvio maps your file's columns to Shopify fields automatically. Check each row in the mapping table and adjust any that look wrong using the dropdown. A "Products ready" count and a mapped-columns count at the top tell you what's about to happen.
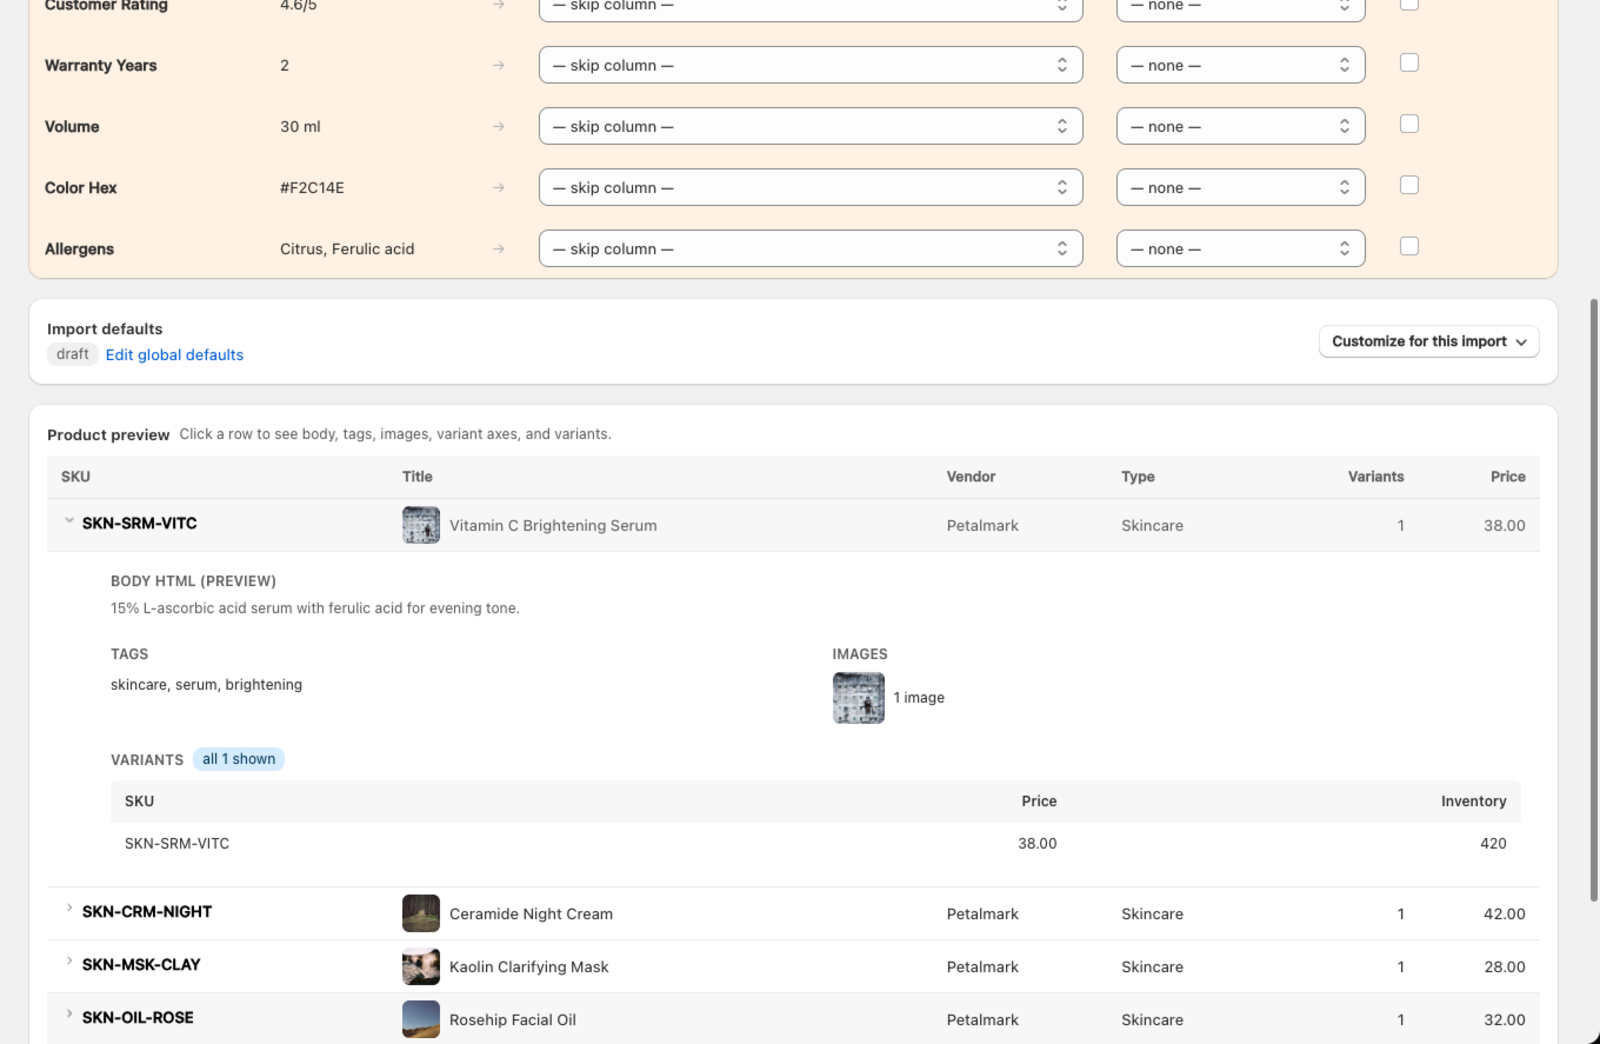
- Check your defaults — the Import defaults card shows the status and other values that will fill in any blanks in your file. Click Customize for this import to override them just for this upload, or Edit global defaults to change what pre-fills on every future import.
Below it, the Product preview table lists every product the file will create. Click a row to expand it and see the full body text, tags, images, and every variant before you commit to the import.
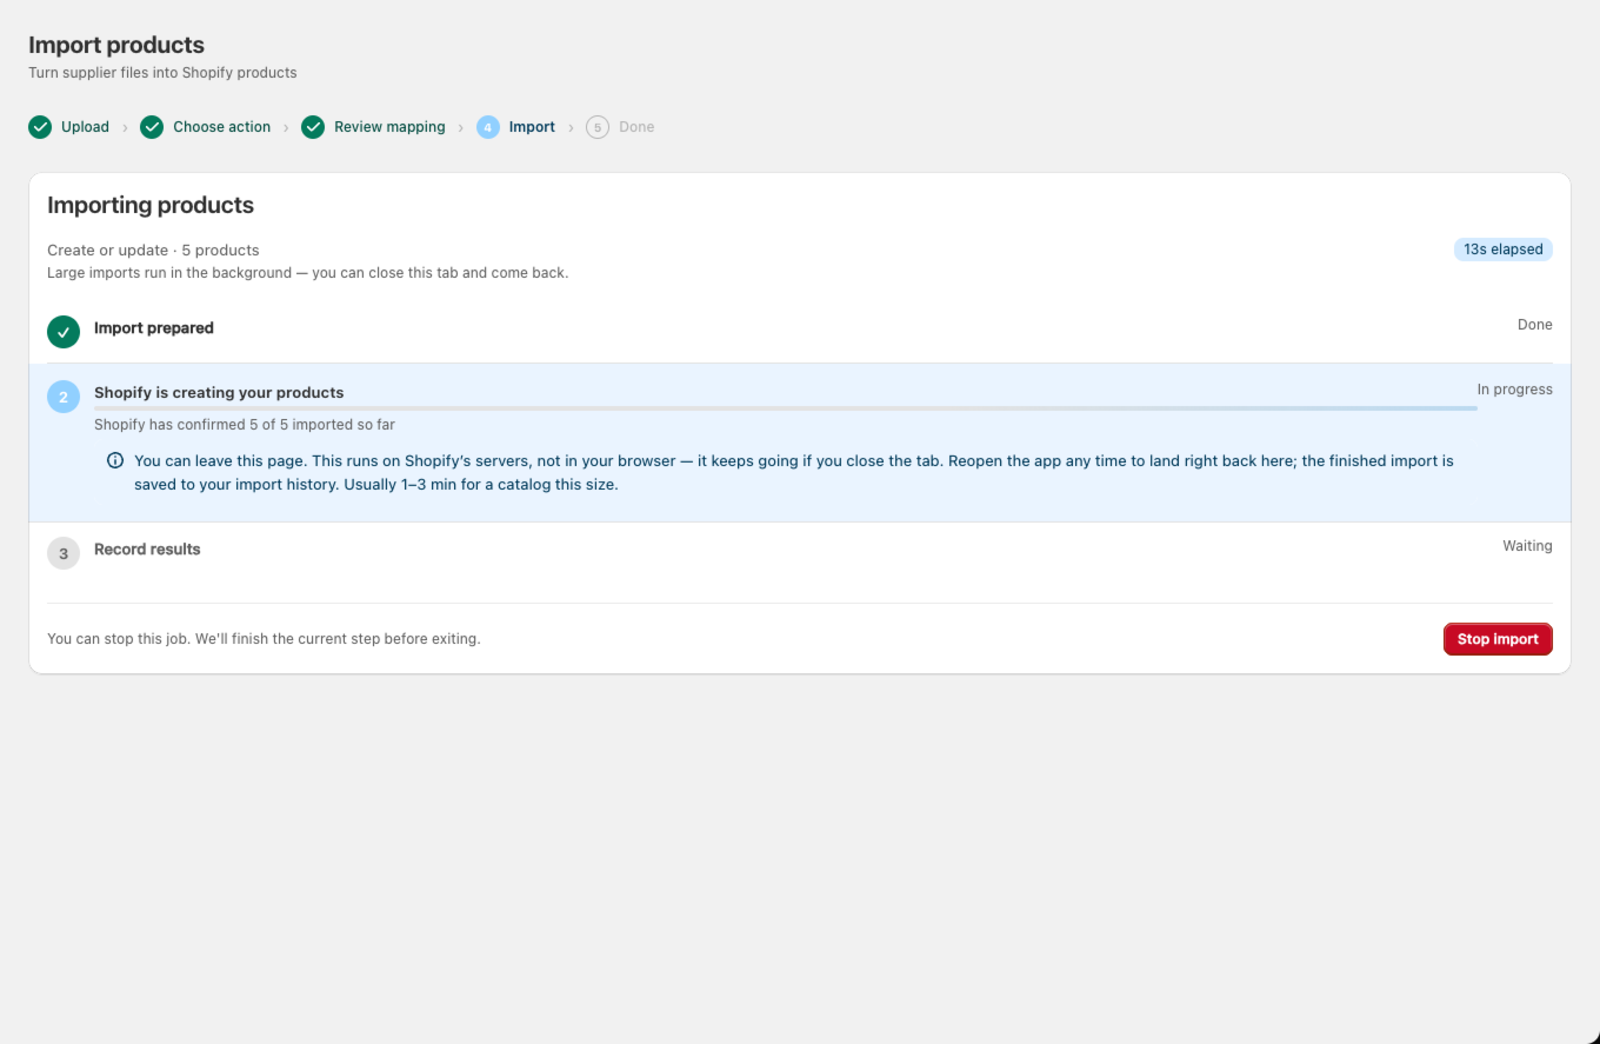
- Start the import — click Import to Shopify to push products to Shopify. A progress screen shows each step as it runs — you can close the tab and come back, the import keeps running while you're away.
When the import finishes, name the supplier so future uploads from the same file layout are recognized automatically and pre-fill the same mapping.
What's in the Csvio app?
| Section | What it does |
|---|---|
| Import (home screen) | Upload a file and run a new import |
| History | See every import, resync, and scheduled sync, check what each one did, retry failed rows |
| Suppliers | See saved suppliers, rename them, start a resync |
| Settings | Set defaults, refresh locations, manage notifications, and view billing |
| Schedules | Set up automatic recurring imports from a URL, FTP, or SFTP source (Pro) |
| Support | Open a support ticket, read our replies, and browse help articles |
What does Create do to products I already have?
Create only adds products that don't already exist in your store — matched by SKU. If a row's SKU already exists, that row is skipped and the existing product is left exactly as it is. This keeps a first import safe to re-run: nothing you already have gets overwritten by accident.
If you need to update products you've already imported — new prices, updated descriptions — see Bulk edit products, or Resync an updated supplier file once you've named the supplier. For the full picture of what each mode does, see Understanding import modes.
What's next?
- How AI column mapping works — understand how columns are matched automatically
- Supported file formats — see which file types and sizes are accepted
- Understanding import modes — learn when to use each mode
Was this article helpful?
Still need help? Open Support in the Csvio menu to send us a message, or email [email protected].